iOS App Signer is an application for Mac that combines various IPA files and (re)sign into a single application. That reformed application is ready to install on an iPhone or iPad. It supports various file types; IPA, deb, app, Xcarchive.
iOS App Signer will install Kodi on your device. Let me show you how you can do that through this article. Actually, the file which is here is designed for Mac and Windows that will bundle all the files together and create an IPA file for an iOS device.
iOS App Signer Requirements
- To install this application, you need to have Mac Os X 10.9 or Later.
- Xcode 7 or later is compulsory.
- A USB cable is a must to connect the iOS device and Mac Computer. Else, the operation will be successful, and you cannot perform installing the apps through iPhone App Signer wirelessly.
- For the Apple TV 4, you need to have different cables like USB – A to USB – C.
So, Those are the requirements you should be ready with.
How to Install & Use iOS App Signer on Mac, Windows
Note: First, you need to install Xcode latest version on your windows or mac. Else, you cannot perform the steps shared below.
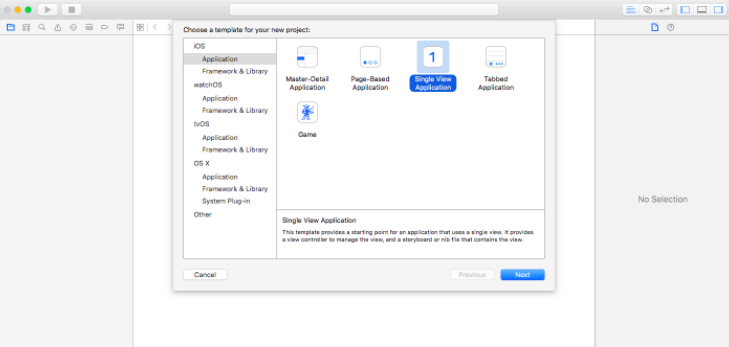
Step 1: First, get the app from here and open Xcode on your Windows or Mac. Create a new iOS or tvOS application. Application type is based on your device type and model. Moreover, it may not change depending on the version of operating system you are using on your iDevice.
Step 2: Give it a Name and the name can be anything. But keep in mind that you need to recognize the file in future. And also choose the Identifier. Otherwise, you need to search for the file all around.

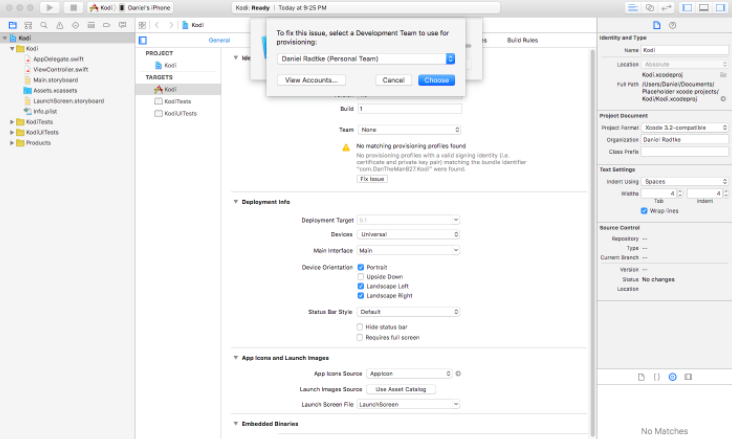
Step 3: Click Fix if you can fix any issue with the Xcode on your Mac or Windows. Sometimes you need to add your Apple ID to solve this issue. Remember, you may enter the Apple ID and Password only when prompted.
Step 4: Select your Apple ID if already given. Or else, you need to enter it manually and follow the instructions below.
Step 5: With any other additional devices, Just plug in the device. Go to the Product Menu, Select your Device under Destination. Xcode will not generate any issues further.
Step 6: Open iOS App Signer on Mac or Windows. Select the Deb and your signing certificate. Along with that, Do not forget to select the Provisioning profile.
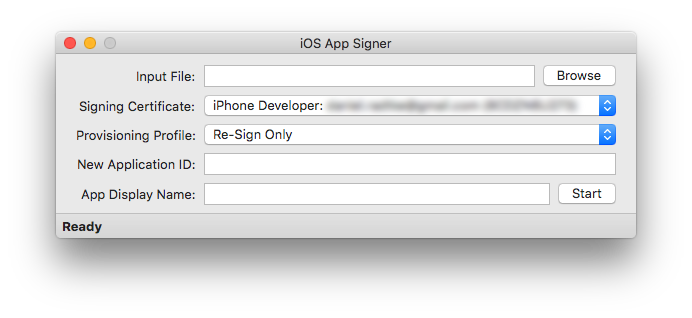
Step 7: Click on Start Button and also select the output filename to save it on your Mac or Windows.
Step 8: Now, Go back and open Xcode on Windows or Mac. Click on the “Window” menu and then click on Devices. You are going to install the apps on your iOS device.
Step 9: Select the output file generated by the iOS App Signer on Windows, Mac. Follow the simple on-screen instructions to install the apps on your iPhone or iPad.
This way, you can try Installing Kodi on iPhone using Xcode. But check out the wonderful tutorial to Install Kodi on iPhone without Jailbreaking and without Xcode, Computer.
In case if you have more than one device
- Plugin the Device to your Mac or Windows using a USB Cable (USB – A, or USB – C).
- Go to the Product Menu now.
- Select the device on which you are about to resign the apps under destination as in Step 5.
- So, you can continue from Step 6 to wrap it up.
That’s all for this session.
Wrapping Up
iOS App Signer is the best tool that can combine various IPA, deb files into one. It will help you do all those things on your Mac or Windows computer. For Example, You can Download, Install Kodi on your devices with ease. Moreover, this is completely free and open source, and you can find the source code on Github.
Leave a Reply