In this article, I will guide you on the topic “How to Use Odin Properly“. Let’s go ahead if you are one among those who would love to learn.
Have you ever wanted to flash a Custom ROM on your Samsung device but couldn’t proceed due to lack of resources? We have seen a lot of users asking for guides of flashing ROMs on Samsung devices such as Samsung Galaxy S7, S6, Note 5, Note 6, etc.
Well, flashing custom ROMs on Android devices isn’t some rocket science or requires any specialized training. However, the flashing process for Samsung Devices is a bit different compared to other Android devices.
Well, the problem is standard flashing tools aren’t designed for Samsung phones, and they will not be able to flash ROMs on any Samsung device.
There’s a specialized flashing tool called Odin built for Samsung devices. Beginners may feel a bit complicated to use Odin, that’s why we’ve decided to come up with an article to explain how to use Odin for Samsung smartphone flashing.
Today, in this article, we’ll explain everything about Odin and will also guide on how to use Odin without any issues on your computer or laptop.
In case if you don’t know what Odin is or used for, worry not, we’ve got your back. In this article, we’ll cover almost all the Odin related stuff. So, that you will be able to use Odin without any worries or issues.
By the way, Check out the trick to Fix Kernel is not Seandroid Enforcing on Samsung devices.
Contents
What is Odin?
Usually, Samsung provides their official updates to the users via OTA (Over the Air). Generally, users will be able to download the update and install the update with just one tap. The whole process is automatically carried out when you download the updates via OTA.
However, there will be situations or cases where a Samsung device will not be able to receive or download the update through OTA.
In such conditions, the update or ROM needs to be flashed manually using a flashing tool. On a lighter note, there are many flashing tools available for Android device, but most of them don’t work for Samsung devices.
As of now, Odin is the only tool that is capable of flashing Firmware updates or ROM files for Samsung devices. Odin is not only used for flashing custom Roms, but also for downgrading Android firmware or stuck on boot loop etc.
Flashing stock android or custom ROM is the best way to get rid of any software related issues of any android device. So, if you wanna flashing your Samsung device using Odin, then go ahead and follow the step by step guide given below.
By the way, We have shown you everything provided below from Odin3 and it’s the latest version.
How To Install Odin3 [Step-by-Step Guide]
You obviously need to download the Odin application on your Computer or Laptop for flashing the Android device.
In case, if you don’t have Odin installed then here are the steps that you need to follow in order to get it. Just make sure you have an active internet connectivity on your Computer or Laptop for downloading the necessary files.
- At first, you need to download the Odin Files from the given link and save it on your computer or laptop.
- The file is in .Zip format. It means that you need to use any extracting tool such WinRar to extract the files from the zip.
- You will find “Odin” folder in the zip, just extract it to your Desktop to proceed further.
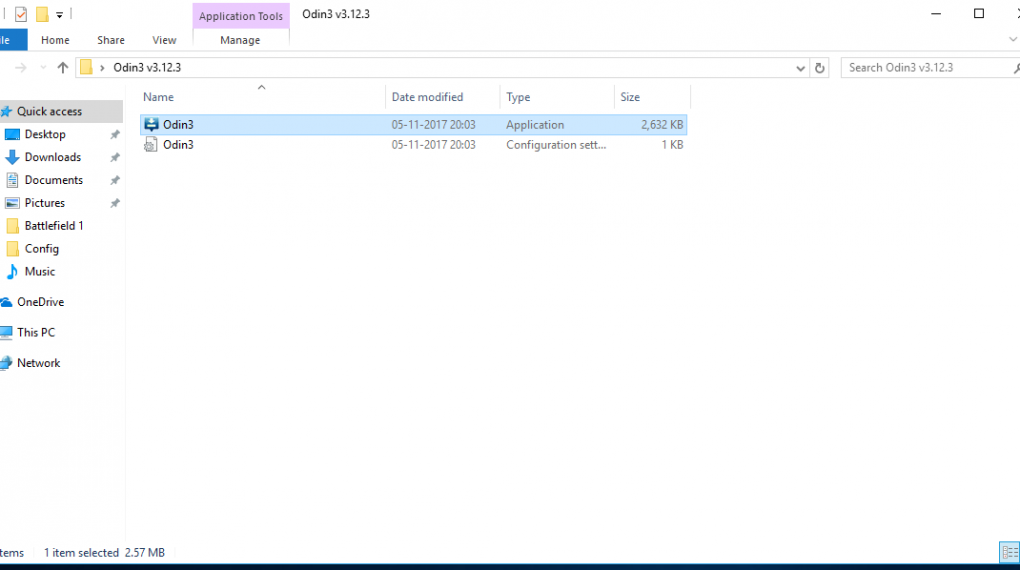
- Now open the folder, you will find two files named “Odin” with different formats. You can check the image attached below for reference.
- Just open the first “Odin” which is in “Application” type. You can ignore the second file, no need to touch it.
- In case if the application doesn’t respond, then right click on it and select “Run as Admin.”
- That’s it, the application will load up, and you will be able to use it for flashing your devices without any issues.
Note: The app may ask for permissions during the startup process. Just grand the required permissions for the app to be started. If you already have Odin installed on your system, then you can skip this part and move on to the next part i.e. how to use Odin.
How To Use Odin3 for Samsung Smartphones
Here comes the main part of Flashing any Samsung devices. I would suggest you read everything twice before jumping into the process right away in order to avoid any uncertainty. You can use the comment section to ask your doubts if you have any.
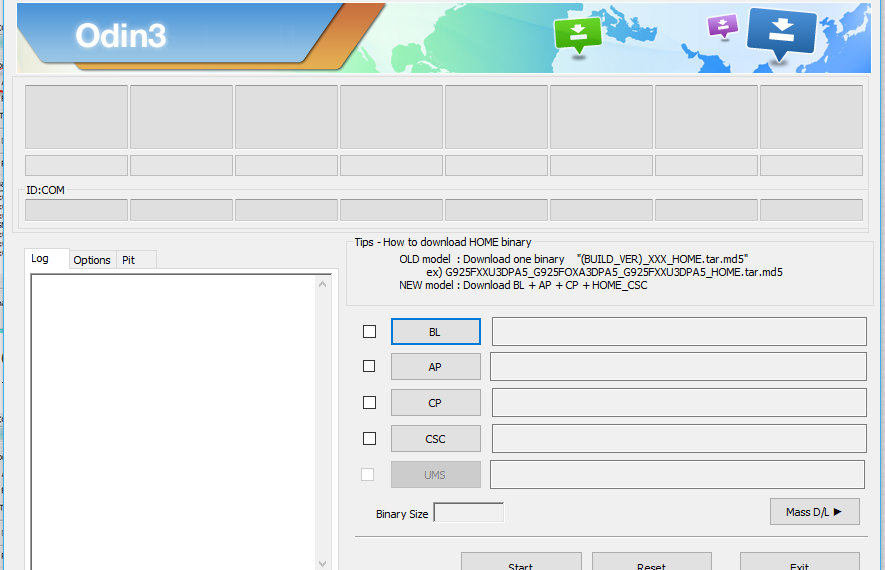
So, when you start up the Odin application on your Computer or Laptop, it would be look something like this.
Now you need to connect your Samsung device to your computer using any USB cable. Make sure your device is in download mode before connecting to the system.
In order to go into download mode, hold down Volume down + power button + home button simultaneously until you see a “Warning” Screen. Then hit volume up button to proceed further with the process.
That’s it, now your device is in Download Mode, and you can connect it to your PC or laptop.
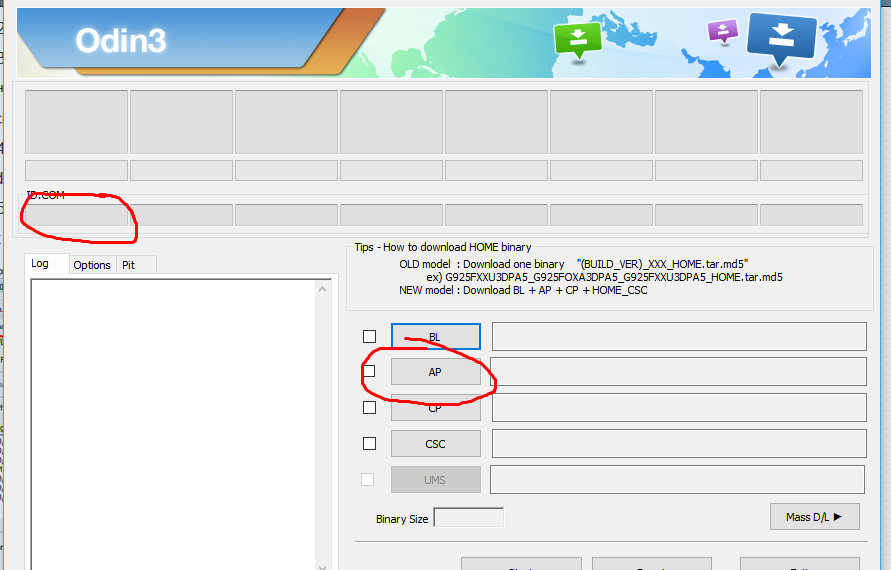
After you connect your device to the Computer, the tool will detect your device and analyzes the files. To confirm if your device is connected or not, you can look up at the “ID.COM” section.
If it’s connected, then you will see details of your device. Now just select the “Tar.md5” file from the ROM files that you are flashing. Hit “Start” option to begin the process of flashing.
Let the tool do its work of flashing, within 5 minutes you will get the result of flashing. If the flashing process is successful, then you will get “Pass” message in green.
In case, if the process is unsuccessful, then you will get a “Failed” message in red color. You can perform the flashing process two or three times to get the successful result.
That’s it; now you have successfully flashed your device using Odin. I hope, now you have learned how to use Odin through this article.
Just make sure you download the ROM according to your device model from the manufacturer site and load it in the Odin for the successful result.
Also, check out how to fix unfortunately the process com.google.process.gapps has stopped on Samsung.
Wrapping Up
That is all you need to know about using Odin3 on Samsung smartphone. Make sure you mention any unsolved issues in the comment section provided below. Share this guide with your friends who have Samsung smartphones. Thank you so much.


Leave a Reply